
Water stains spreading across your ceiling are more than just an ugly mark. They are a warning sign. Left untreated, Ceiling Water Damage can lead to mold, weakened structures, and expensive repairs. What starts as a small drip can quickly turn into a major problem.
The good news is that if you act quickly, you can stop the damage from getting worse. Understanding the causes, the risks, and the right steps to take will protect your home and your health.
At NRG Restoration, we’ve seen how fast ceiling issues escalate when ignored. This guide will walk you through what to do right away, when to call for help, and how professional services make the difference.
Still thinking? While you wait, mold is already moving in.
Our licensed restoration experts are on call 24/7, ready to dry, restore, and protect your home. Don’t risk your health or your house.
What causes ceiling water damage?
Water doesn’t just appear on your ceiling without reason. It usually points to a problem somewhere else in your home. Knowing the source helps you fix it before more damage happens.
Some of the most common causes include:
- Roof leaks caused by missing shingles or storm damage.
- Plumbing issues from burst pipes or loose connections.
- Leaks from bathrooms, especially around showers or tubs.
- Air conditioning units that drip due to clogged drain lines.
- Condensation buildup in poorly ventilated spaces.
Each of these causes requires a different solution. That’s why identifying the source is the first step in dealing with Ceiling Water Damage.
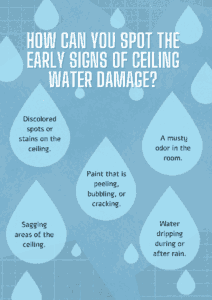
How can you spot the early signs of ceiling water damage?
 Sometimes the damage is obvious. Other times, it’s hidden until it becomes serious. Learning to notice the early warning signs helps you take action quickly.
Look out for these signs:
- Discolored spots or stains on the ceiling.
- Paint that is peeling, bubbling, or cracking.
- A musty odor in the room.
- Sagging areas of the ceiling.
- Water dripping during or after rain.
When you notice any of these, it’s important not to wait. Addressing the problem early can save you from bigger repair bills later.
What should you do first when you see ceiling water damage?
Discovering a wet spot on your ceiling can be stressful, but quick action prevents things from getting worse. Before calling for repairs, there are some basic steps you can take to control the situation.
Here are the first things you should do:
- Move furniture and valuables out of the area.
- Place a bucket under active drips to collect water.
- Puncture a small hole in sagging areas to release trapped water safely.
- Turn off the water supply if you suspect a plumbing issue.
- Take photos of the damage for insurance purposes.
Taking these steps keeps the situation under control until professionals can arrive.
Can ceiling water damage lead to health risks?
Yes, Ceiling Water Damage can cause more than just property damage. When moisture lingers, it creates the perfect environment for mold growth. Mold can spread quickly and pose serious health risks to your family.
Here’s how water damage impacts health:
- Mold spores trigger allergies, coughing, and breathing problems.
- Long-term exposure can affect children and people with asthma.
- Bacteria from contaminated water leaks can spread illness.
- Poor air quality lowers comfort inside your home.
This is why dealing with water damage quickly is critical—not just for your home, but for your well-being.
How do professionals assess ceiling water damage?
Homeowners can spot surface problems, but professionals know how to uncover hidden damage. A proper assessment is key to fixing the root cause.
During a professional inspection, experts will:
- Check for leaks in the roof or plumbing systems.
- Use moisture detection tools to find hidden damp spots.
- Inspect insulation and drywall for water saturation.
- Identify potential structural weaknesses.
- Evaluate mold risks in affected areas.
This detailed process ensures the repairs are complete, not just cosmetic. At NRG Restoration, we always begin with a full assessment to create a proper plan.
What repairs are usually needed after ceiling water damage?
The type of repair depends on the cause and the extent of the damage. Small leaks may require minor fixes, while bigger problems can mean full replacements.
Repairs may include:
- Fixing or replacing leaking pipes.
- Repairing roof shingles or flashing.
- Replacing soaked drywall and insulation.
- Treating affected areas to stop mold growth.
- Repainting the ceiling once it is dry and safe.
Every step should be handled carefully to prevent the problem from returning.
How can you prevent ceiling water damage in the future?
Prevention is always easier than repair. By maintaining your home regularly, you can reduce the risk of Ceiling Water Damage.
Some preventive measures include:
- Inspecting your roof after heavy storms.
- Checking pipes and plumbing connections regularly.
- Cleaning gutters so water flows away from your home.
- Servicing air conditioning units to stop leaks.
- Using proper ventilation in bathrooms and kitchens.
These habits make your home stronger and better prepared against unexpected leaks.
Why should you call professionals instead of DIY?
It’s tempting to try fixing ceiling issues on your own. But water damage is often deeper than it looks. Without the right tools and knowledge, DIY repairs can make the problem worse.
Professionals provide:
- Expert detection of hidden leaks.
- Advanced drying equipment to remove moisture.
- Safe removal of mold if present.
- Structural repairs that last long-term.
- Guidance with insurance claims for covered damage.
NRG Restoration offers these services to ensure your home is safe, secure, and restored the right way.
What role does insurance play in ceiling water damage?
Insurance can help cover repairs, but only with the right documentation. A professional assessment makes it easier to file a strong claim.
Insurance support includes:
- Proof of damage with photos and reports.
- Accurate repair cost estimates.
- Clear explanation of the source of damage.
- Assistance during the claim process.
Having professionals on your side gives you peace of mind when working with insurance companies.
Disasters are personal. So is our help!
Whether it’s water damage soaking your walls, fire damage leaving smoke behind, mold creeping in, or storm chaos tearing through your space, we’re not just contractors. We’re your cleanup crew, rebuild squad, and peace-of-mind providers.
Take action before ceiling water damage gets worse
Ceilings tell the story of what’s happening above them. A stain today could be a collapse tomorrow if ignored. Ceiling Water Damage should always be taken seriously, and quick action is the best way to protect your home and health.
Start with simple steps, call professionals for a full inspection, and follow through with proper repairs. Prevention afterward keeps your home safe for the future.
If you’re dealing with ceiling water problems, NRG Restoration is ready to help. From inspections to complete restoration, our team ensures your property is safe, dry, and secure.
Don’t wait until it’s too late reach out today and take control before the damage gets worse.